How to draw a pumpkin - 3 levels
Hello my Halloweeny friends! It's that spooky time of the year again and we are seeing everywhere the iconic pumpkin. This can be a tricky fruit to draw, so I have created a drawing tutorial video for you. The video is broken down by the difficulties easy, intermediate and expert, so that you can follow at the level you feel comfortable in. And of course, if you wish to, you can push yourself a little more to improve your skills.
The main difference between the levels are the colour accuracy, level of detail and nuance of texture. The video is made in such a way that we build up the skill level from easy to expert, so watch it from the beginning even if you are an expert.
I used Adobe Fresco to draw these, but the tips and tricks work also for Photoshop, Procreate and Sketchbook. Below the video I share more info on the brushes and colours I used so you can mimic them in the software of your choice.
Video Tutorial
Brushes
Level Easy
For the easy level, you will only need 2 basic brushes: Soft round and Hard round.

Level Intermediate
For the intermediate level start off using a pencil to draw and then used brushes pastel square and vine charcoal 2 to create texture. The spatter1 brush was also used for texture by creating an spatter effect.

For the stem, I created texture with the rake grit brush.

Level Expert
For the expert level, you'll start off also with a pencil. To create the right texture I played with a lot of brushes, see image below, and followed my reference image. I recommend you play with the ones you have available first and if you cannot find matching brushes, check out the alternative brush section below.

Alternative Brushes
Here is a breakdown of the brushes I used, what difficulty level I used it for, where to find them and which downloadable alternatives there are.

The alternative brushes that you can download are for Adobe Creative Cloud members and can be found here.

For those not using Adobe products, here is a reference image so you can see which effects the texture brushes I used make so you can find similar ones on your programmes.
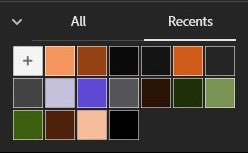
 Colours
If you are using a reference image, the easiest way to get the colour is with the colour picker:

You can then choose colours for the your shadows and highlights by modifying the brightness (image below) which means you won't affect the hue of the colour.

I highly recommend to also play with the blending mode and opacity of the layer so you can get the right transition and colour for the shadows and highlight. For shadows I like to use the multiply blending mode and for highlights screen.

Level Easy

To create the complete image of the easy level pumpkin, I used these colours:
The colours you can use to create the pumpkin and stem only are:

Level Intermediate

To create the complete image of the easy level pumpkin, I used these colours:

The colours you can use to create the pumpkin and stem only are:

Level Expert

To create the complete image of the easy level pumpkin, I used these colours:

The colours you can use to create the pumpkin and stem only are:

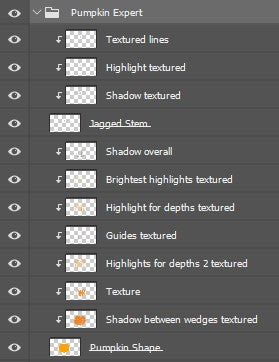
Layer Structure
Below you'll find images showcasing the layers structure I used for the pumpkins at the different levels. The principle is the same, I usually create a layer with the object shape, like the pumpkin body and I'll add one or multiple clipped mask layers for the texture, shadows and highlights. You want to keep the texture, shadows and highlights separate, so you can apply different blending modes and opacity settings.
Level Easy

Level Intermediate

Leve Expert