How to make your own passport case
I am mentally getting ready and excited for when we can travel again, are you?
I made a passport case for myself and made this tutorial so that you can make one too. In this short video tutorial, you will learn how to make your own passport case from scratch. You'll also learn some tips and trick on how to sew around corners.
If you give this a try, please tag me @taniarosasdesigns on Instagram in your creations as I would love love love to see them! 💓
Estimated creation time
It takes about 45-60 mins to prepare and create this passport case. Times will vary depending on your expertise, design you choose and tools.
Materials*
-
Leather or fabric of your choice: I recommend leather of 1.1 mm thickness. Try to avoid thicker leather so that the passport case closes properly and you won't have to bend your passport too much every time you insert it or take it out. Cork leather would also be very cute. You can find scrap leather sewing machine thread to match the leather. You can also choose instead an accent colour.
-
Scissors or cutting tools: Use the appropriate cutting tool based on the fabric you chose. If it is leather, you can use a leather knife like this one.
-
Measuring tape or ruler: Any measuring tools will work. Since the project has 90 degree corners, metal corner ruler would work best.
-
Optional:
-
Choose your preferred method to keep the material in place while you are sewing. This will make it easier to sew but is not needed. You can use double-sided tape or contact cement for leather / glue or sewing clips
-
If you want to add your own design to the leather, you can use stamping tools or letter stamps like the ones I use. For this you will also need a mallet. Don't use a conventional hammer as it might be too strong damaging the stamping tools and potentially cutting through your leather/fabric.
*If you are having trouble finding the materials, you can use the affiliated Amazon links above. It means I will receive a small commission for taking you to the right product, should you decide to make a purchase.

Watch the video to start the tutorial or if you prefer keep reading the instructions below.
Steps
1. Measure and cut materials
You will need the following:
- 1 piece of leather/fabric with the dimensions 21.5 x 15 cm
- 2 pieces of leather/fabric with the dimensions 5 x 15 cm
2. (Optional) Add a design
If you have decided to add a design, this is the right time to add it. You can add your logo and get creative with stamping tools.
I used the letter V and I to create ethnic looking shapes. I interchangeably added one line per letter until I completed the front side of the passport case.
Grab a scrap leather piece, let your creativity tell you what shapes to make.
3. Assemble & sew
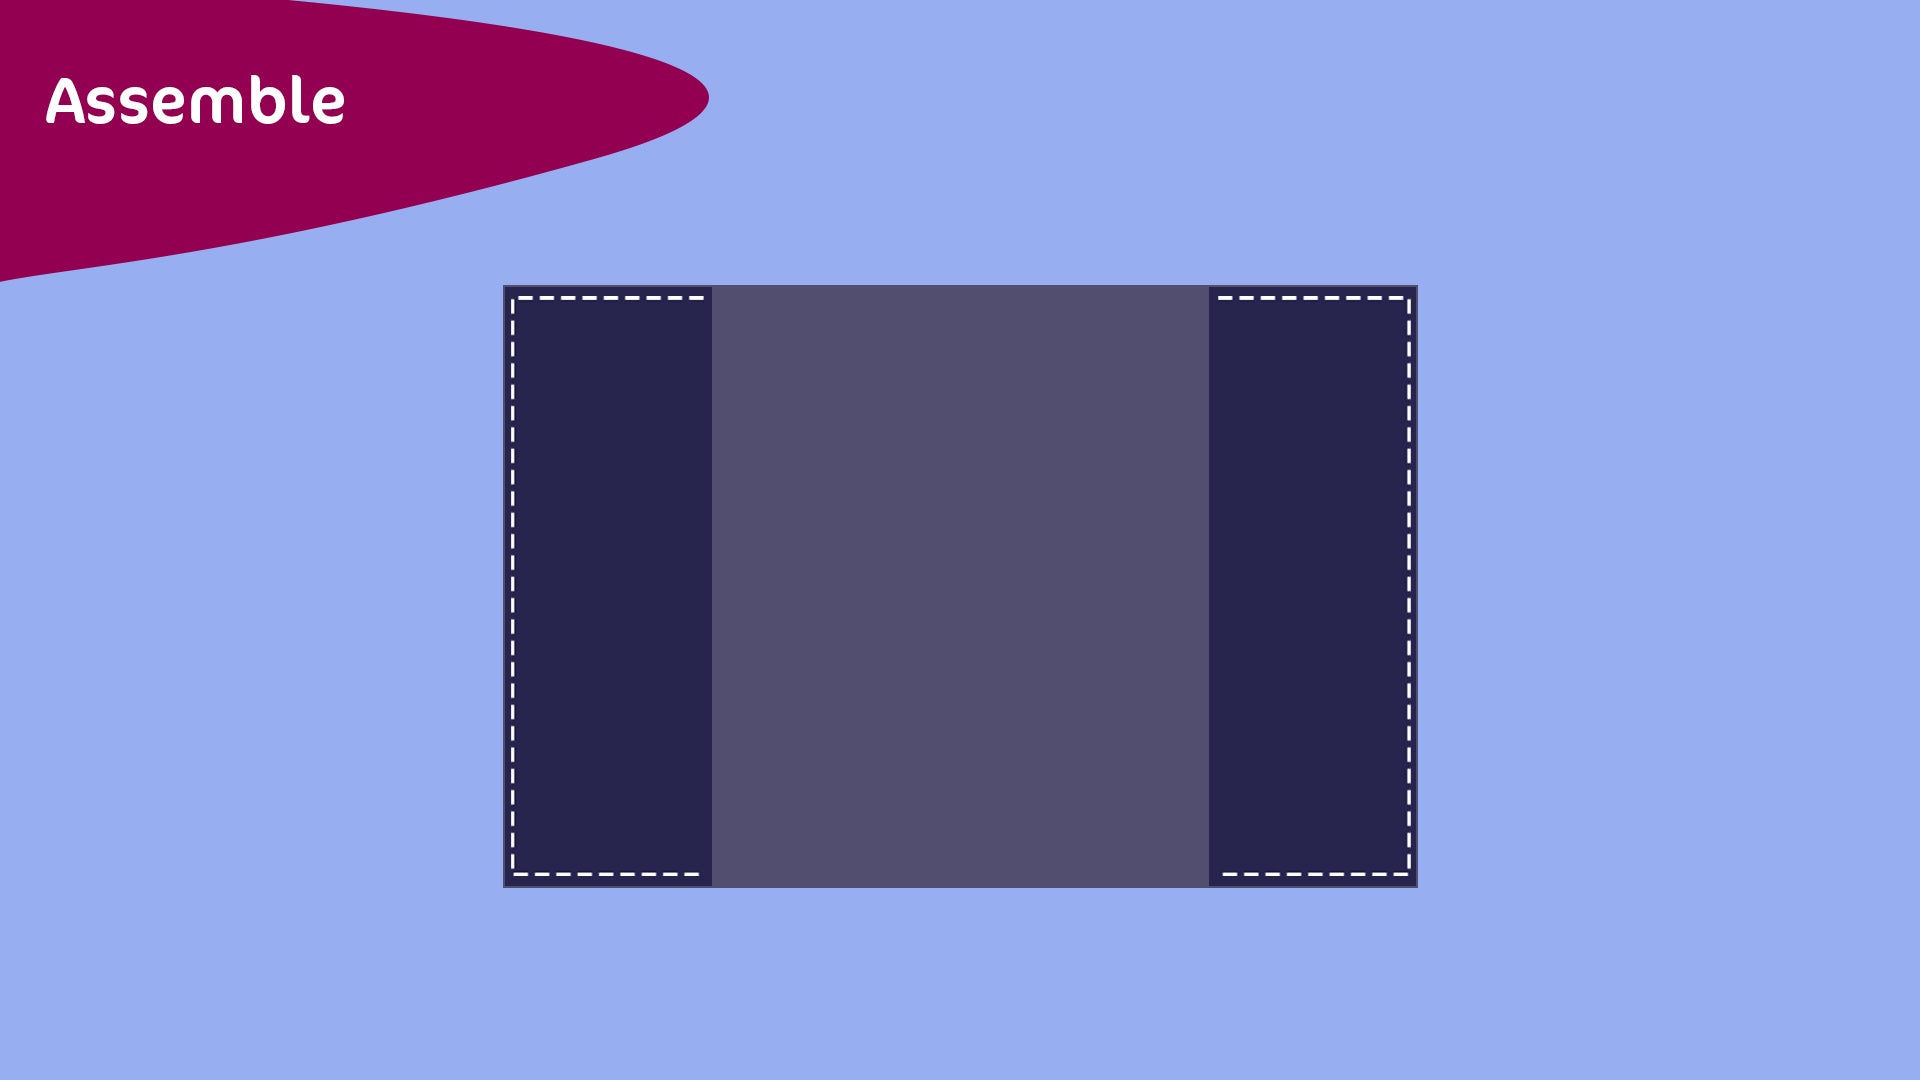
- Place the large leather piece on your table having the right side facing down, in other words the side with your design or the side that will be visible when the passport case is closed.
- The 2 smaller leather pieces should be placed on the left and right hand-side of the main leather piece.
- Use your double-sided tape, contact cement or sewing clips to keep the smaller leather pieces in place.
- Sew only along the edges as highlighted with the while lines in the image below. If you sew on the inner part, you won't be able to insert your passport.

3. Finish
- Trim loose threads and if needed use a lighted to melt the thread in place.
- Depending on your material, you may need to trim the leather to make sure it is even throughout the project.
- You can burnish the edges and paint them to give them a cleaner look if you like.


